Monday, April 30, 2012

Garlic Grilled Shrimp


I've recently discovered how much I love my George Foreman grill. Thanks, Lisa! :) If you're looking for a quick and easy weeknight dinner, it's very simple to grill up some shrimp and make a healthy salad! 

You could also make some grilled veggies!

Ingredients:
1 cup small shrimp (thawed if frozen) 
3 tablespoons extra virgin olive oil 
1 teaspoon basil
1 teaspoon oregano
1 teaspoon marjoram
1 clove garlic, minced
Salt and pepper to taste
1/2 teaspoon shallot, minced (optional)


Combine olive oil, herbs, spices, and garlic together in a bowl. Add thawed, cooked shrimp. Let sit to marinate for about 20 minutes. Plug in your Georgie, give it a good coat of olive oil cooking spray and you're all set to go! If you are using pre-cooked shrimp, all you need to do is heat them long enough so they're warm. If you're using uncooked shrimp, cook them for about 3 minutes on each side (or until they're pink in color).


The cool thing about this recipe is that the juices that are created when the shrimp are "cooking" make a great vinaigrette dressing for a salad!


Grilled shrimp + spring salad mix + tomatoes + avocado = big smiles.

Tuesday, April 24, 2012

Spicy Baked Tofu Tacos


This recipe for spicy baked tofu tacos caught my eye on Pinterest (a borderline obsession of mine). I had half of a package of tofu and needed to find a yummy recipe to make. I found one! It comes from a blog called Peas and Thank You. So cute! Here's my take on her recipe.

What You'll Need:

For Marinated Tofu:
2 Tablespoons Soy Sauce
Juice of 1/2 a Lime
1 Teaspoon Granulated Sugar
1 Tablespoon of Water
1 Clove of Garlic, Minced
1/2 Teaspoon Chili Powder
1/4 Teaspoon Cumin
1/2 of a 14 ounce package of Extra Firm Tofu 
(drained and pressed if packaged in water, and cut into thin slabs)

For Tacos:
Whole Wheat Tortillas
Shredded Green Cabbage
Guacamole
Salsa


Combine all of the ingredients for the marinade in a container that has a lid. Slice the tofu into thin slabs (about 1/4 inch thick) and add to the marinade container. Gently shake the container until the tofu is covered with marinade. Tip: Don't go nuts...tofu is delicate! :) Refrigerate for about 2 hours.

You can also let this sit overnight to really soak up flavor!


To bake the tofu: Preheat your oven to 350. Spray a baking sheet with olive oil and spread out the tofu slabs so they are about an inch apart. Drizzle the remaining marinade over the top of the slices.


Bake the tofu for about 10 minutes. Remove pan from oven, flip the slices, and bake again for about 10-15 minutes, or until the slices get crispy on the edges.


To make tacos: Spread guacamole on your tortilla, and add tofu slices. Top with chopped green cabbage, and salsa. I used fruit salsa... yummy! Makes about 4 tacos.


Enjoy! :)

Saturday, April 21, 2012

Windowsill Herb Garden Update


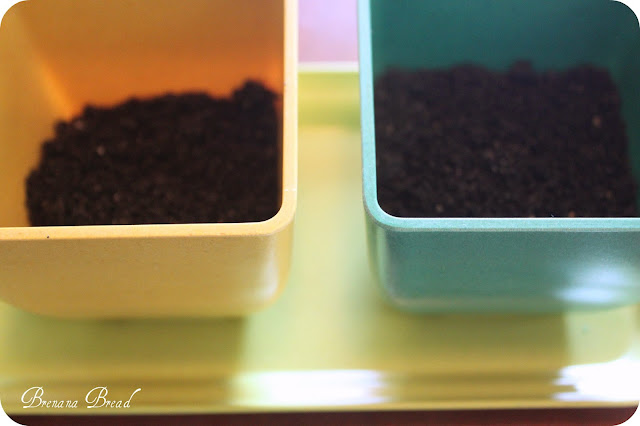
It's been a month since I first posted about my windowsill herb garden. I was so excited to see some green coming up and now I have actual herbs! They're still pretty tiny, but it's nice to see some progress! 

My Saturday morning project: replanting the herbs into their new homes.


Nichole and I found these cute little herb garden planters when we bought our windowsill greenhouses. Fun fact: they're biodegradable! They're made by Rush Creek Designs. Visit their website here

They have a lot of biodegradable products that last years in your home, but once they're thrown out they will biodegrade in 2-3 years. They're made of bamboo fiber, rice husks, wheat straw, and corn stalks. How neat!! 


I took the netting off of the herbs and planted them into the planters. It was easier to work with them when the netting was off and I was able to move them around easier so they fit into the containers.


It got a little messy, but I'm happy with the results! 


Thursday, April 19, 2012

Spicy!


My amazing, fun-loving, thoughtful, warm hearted Uncle Kirby and Aunt Stephanie gave me the BEST housewarming/staring out on your own gift that any girl who loves cooking and spices as much as I do could ask for! :) A whole bunch of my favorite spices! Penzey's spices at that. Penzey's = love. In fact, their slogan is "Love people. Cook them tasty food." Find their website here! Request a catalog. You won't regret it.


In order to get the biggest bang for their buck, they ordered the spices in bags. I tried to find a bunch of cool, random jars while thrift shopping, but I didn't have much luck. Finally, I ended up getting jars from Penzey's. And so began my weekend craft project. 


Each jar comes with a label that you can write on, but I wanted to save the label that came on the bag. They give information about the spice and also include recipes and tips on how to use the them. In order to keep it uniform with the other spices that I already had in jars, I decided to get creative and find a way to put the label from the bag onto the jars. This was done using double sided tape, contact paper, and a lot of patience.


I now have a beautiful collection of spices, and each has their very own special container. It's much more convenient and they look so good! I'm going to have a fantastic time adding to this collection. :) Each Penzey's catalog brings more temptation. Soon I'll have to find a bigger shelf! 


Thank you so much Uncle Kirby and Aunt Steph. I think of you every single time I cook. Love you.

Wednesday, April 11, 2012

Kimchi Jjigae (Kimchi Stew) with Sticky Brown Rice


I'm not too picky when it comes to new foods. I like all kids! I'm slowly trying to get myself hyped up to try spicier and spicier foods. I always seem to remember one instance when Avi, my Indian friend, made me curry. I literally turned purple from the heat. Luckily, when Katie made Kimchi, it wasn't as spicy! 

Yet another cooking adventure in my tiny ass kitchen! :)


What you'll Need: 
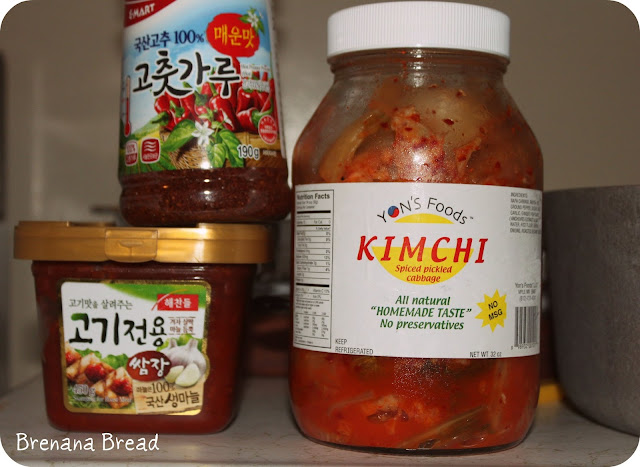
4 to 5 cups chopped kimchi
1 teaspoon sugar
1 teaspoon Korean red pepper flakes
1 tablespoon Korean hot pepper paste
1/2 package of tofu, chopped into cubes
green onions (optional)

Katie brought the Korean red pepper flakes straight from Korea, so I can't really tell you where to get this specific kind stateside. A good place to start is your local Korean/Asian market. :)


Start by cooking the brown rice. Brown rice takes quite a while to cook because it is a whole grain. Find a pot that has a tight fitting lid, and boil 2 1/2 cups of water. Add 1 cup of brown rice, stir it, and cover the pot. Return the pot to a boil, then turn the heat down to a simmer. Simmer the rice for 45-50 minutes or until it's cooked through. 

I was very pleasantly surprised that for the first time in a long time, my rice turned out. Rice always seems to be the thing that I have trouble with...


Cook enough kimchi for as many people as you plan to feed. A good guesstimate is about a cup per person.  Start by putting chopped kimchi and it's juice in a pot that has a lid. Add Korean red pepper flakes and paste. Start with a little and add more because it has quite a kick. Korean spiciness is different than Mexican or Indian spiciness as it is a little more mild. Add sugar and green onion (optional).


Pour water over the ingredients until they are just covered. Close the lid of the pot and boil for about 25 to 30 minutes over medium heat. Add tofu and boil for 5 more minutes. Mmm, tofu! :)


Thursday, April 5, 2012

Macaroni and Cheese-Stuffed Chile Rellenos


Last Saturday night was Girls Night In. I love getting together with friends who are willing to be adventurous in the kitchen! Katie, Bridget and I got together and decided to make Mac n Cheese stuffed Chile Rellenos. Katie suggested it after seeing the original blog post on The Food In My Beard.  We were all very excited to try something new! It was quite a process, but so worth it in the end! We decided to personalize (and simplify) and stuff the peppers with "bugs" mac n cheese. And yes, we're all in our 20's ha ha. :)


What You'll Need:
1/2 White Onion, diced
1 Red Pepper, diced
Macaroni and Cheese (and ingredients to make it)
Mexican Rice (and ingredients to make it)
Olive Oil
3 Poblano Peppers
2 Eggs
Flour
Panko Breadcrumbs
Cilantro


Start off by sauteing the onion and red pepper in a bit of olive oil.


Bugs Mac N Cheese. Annie's Organic! :)


Now to roast the peppers! Preheat your oven to 450 degrees. Spray or coat the poblanos with olive oil and roast them for about 20-30 minutes, or until the skin starts to blacken. The peppers are easier to peel if the skin gets a little black. You can also use a broiler (unfortunately, my broiler is out of commission).


Once the peppers are roasted, peeled, and stuffed with mac n cheese and/or Mexican rice, you can start the  breading process. Coat the pepper in flour first, then egg. Repeat this process 3 times. The last step will be to dip the pepper in panko breadcrumbs. 

Long process, amazing results!

Fry the pepper in olive oil for about 2 minutes on each side, or until the breadcrumbs are golden brown. Panko breadcrumbs make these extra crispy and crunchy. Enjoy with Mexican rice and cilantro. 

Don't forget the Corona and lime! :) Delicious!